To me a pencil in your hand on a nice sheet of blank paper holds all the promise of the possibilitys of a clear vision. Today most all boats are created on a computer screen. This is ,with a clear vision the best way to go as the computers calculator does a lot of the math for you in a nano second. If you draw in an ugly skiff that is what it will spit out , but the numbers will be perfect dilineating your ugly skiffs proportions. It will not cough a bit and blink on and off trying to let you know that it's all wrong.
Same thing on paper so you have to have your vision in your head in advance. Either way you need to start drawing or moving the mouse about till you get your skiff fleshed out. From here you can start adding up the numbers. I use an $ 8.00 solar pocket calculator to help me do the math. This I have done for all my designs.
I will say it here again before you start this process you need to have your weight list , your target draft number, and what you think your hull will weigh when built. A bunch of the current skiffs being created to day are just winging it by taking an existing proven design and changing it a bit so as to not get sued , and adding a few different details to hopefully improve on these past designs.
I am all for improving on past ideas, this is how things evolve . But I think it's pretty silly when these new skiffs on the block are claiming to have reinvented the flats world with the best design ever when it's so obvious where their vision came from.
What they should be advertising and explaining is what makes their skiff so special. The new details, things they feel they have improved and why it's so much cheaper in price. Could be they're nice guys and are passing on the savings to you or the skiff is just plain cheaper.
This is how I calculate my designs by adding up the cubic inches in between each station section.
You can figure the displacement out on an existing skiff by taking the lines off from the outside of the hull and then drawing up the skiff . From here you can then add up the numbers and from these you can then decide on what changes you will be adding or subtracting. This is worth your time as it gives you a good idea of where your skiff will float. It will not give you any idea on how your new design will perform but that's in your vision so hope for the best. I have all my past designs on paper with all the knowledge of what worked and what could be improved on. This gives me a very good idea of what I'am going to do next. When you are just copying and splashing others designs you are relying on your guesses of putty thickness and what you think will improve this skiff. I have done this several times in my career but I have done the math before hand so as to get a good idea of what's going to happen.
I encourage all of you out there to use my past designs as a reference . I'am looking forward to seeing the new skiff ideas.
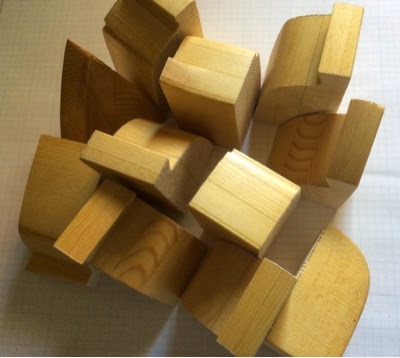
What the ..... Look at all the station sections.

All assembled . You just trace around this shape very carfully to get the profile . Mark in each station section .

Now if it's not enough to get to your desired draft then there are several ways to add or subtract to get too your design goals. By placing the hull skin on the inside of the lines you can subtract or by putting it out on the outside of the lines drawings you can add significant flotation. But making the boat wider adds a small amount as its just a sliver. At this point you can then start thinking about what to change . This I do on paper several times before I get to making my half hull. When I'am at the half hull stage I pretty much know what's up . Once the half hull is made I can then see it in three dimensions. Of course on computers today this can be done in a split second but feeling up the screen to caress your new creation is not so much fun.

Have fun...and any questions just email me....... Get going, start drawing


1 comment:
right there with you on 'paper and pencil'.....drew Geno Baker's sportfish on the back of a Bahamas chart.....guarding my 4' bendy straight skinny spruce fairing rulers carefully.
it's really great to read your stuff on this rainy Jacksonville day.
Post a Comment