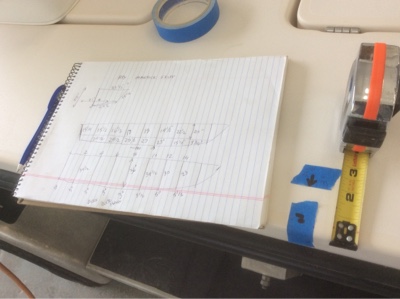
This blog is about how I build one off decks, hatches, cockpits or just about any type of fiberglass part needed for a custom build or modification.
The deck being built here was for a gentleman that I met over the Internet asking my advice on his home build. I first met Reeve online when I was sailing in the Carribean two years ago. He emailed and was asking advice here and there on how to do the details on the ENVI BOATWORKS 17' skiff he was building out of Corecell core and Raka epoxy. Turned out he is a Dentist and lived in Gainsville where our daughter Lillian was going to collage. Dr. Reeve ended up doing some dental work on Lillian.
When we went up to Gainsville for Lillian's graduation Reeve invited all of us to stay at his house for the time we were there. I got to see his skiff build.
Reeve had done a great job of building the hull which was built using the ENVI boats kit jig setup.
There were no plans for the deck and how to build a custom Oneoff deck with all the details of modern hatch drains, curves, lips and such.
I could see Reeve was at a stopping point on his project as he had no idea on how to finish his skiff in the same detailed manner he had gotten so far.
I told Reeve I would be happy to build his deck for him as thanks for his hospitality.
We made plans for me to come back.
When I returned Marc the owner of ENVI BOATWORKS came down from Carolina with his wife to watch me in my build process. Marc couldn't believe that I could build a custom deck in less than a week.
Follow along here and you will see that any kind of part can be made very easily with the right planning in advance.
The parts being made here will have to be sanded and finished painted.

Here's the LITHIUM SKIFF built by Geneo Baker all done Oneoff.
Geneo built his deck the same way you will see here. This system is what every plug builder uses when building a finished mold from scratch by hand.

Here's Reeves skiff.

Reeves home is back in the woods and it was nice and quiet when I turned off the fans. The heat was around 90-92 degrees most all the time with plenty of big slow Mosquitios about.
This is his workshop.

First thing I did was to make patterns using door skins of the deck sheer, where the bulkheads lined up and where all the locker openings were.
Door skins are 1/8" cheap plywood you would use to resurface a damaged hollow house door. They are cheap at $12.00 each and are very smooth.

I use sheet rock screws to hold all the pieces in place screwing into his hull core.

The deck patterns are all in place. The hatch openings are in place with the openings showing what the outside edges of the hatches will represent. You have to know how wide your hatch channels and gutters are going To be to know what your final opening width will be.
Everything designed was as per Reeves wishes of his deck design layout.
Reeve wanted 3/4" deck crown forward with 1/2" crown aft. The hatches would have to be made to fit this crown perfectly.

Once the patterns are made and all the layout is decided it's time for more room so out goes the skiff.
The lumber is for the deck jig to be built on the floor. To raise it up off the floor takes more lumber and time. I just use the cheapest straightest wood available.
All materials for the building jig, wood, screws, wax, clay cost $265.00.
Building on the floor if it's level is fine but it can be a bit back breaking.

Here is a simple example of what is needed.

Deck patterns layed out to see where the deck supports will need to be.

Deck plywood now screwed down onto deck jig. The crown has been cut into the 2x4s so the plywood just screws down into the crowned curve.
Make sure you have enough extra over hang on the plywood for the outer sheer edge wood to fasten too.
Buy cheap smooth plywood like birch ply or like this stuff from Lowes that was made of some soft smooth wood. I used 1/2" ply. Because it's not going to get wet it can be really cheap stuff but it has to be flat and as smooth as possible. If the ply has more grain it will just mean you will have to sand a bit more on the finished part to get rid of the wood grain texture.

Now lay the deck pattern in place. THE MOST IMPORTANT THING IS TO FLIP THE PATTERN UPSIDE DOWN!!!! In order for the deck to be made you will have to build it inside out. So you have to reverse the pattern. Otherwise it will never fit. No boat hull is perfect from side to side. Your pattern reflects the reality of the deck it was made from. RIGHTSIDE UP. YOU WILL BE BUILDING YOUR PART UPSIDE DOWN.
I allways draw a center line and draw the hatches out from the the middle of the centerline. Some old skiffs can be an inch or more off from sheer topsides from side to side. No big deal if all your hatches are all aligned down the middle. You cannot see from side to side to ever notice these mistakes.
I let the ply run out up forward to make the crown curve be more fair and to not worry about following the deck sheer.
See the extra edge left for the sheer edge plank that is to be screwed in place.

Once the patten has been traced and marked off on the plywood deck form you can start making the hatch channels. I like to screw the inner hatch flanges in place as you can then push against these when applying the clay or wax fillets.
When you lift the finished deck up and off this mold they will just stay in place.

This drawing shows the basics of what's up. The inner flange that the hatch will eventually sit on is the part that I screw down to the deck plug. This stabilizes the hatch. You will have to determine the finished thickness of your hatch to arrive this piece of woods thickness. If it's not at the right depth then your hatch might stand proud of the finished deck. Measure the thickness of the core you will be using. Then add up the layers of fiberglass you will be using. Then decide if your hatch will sit on a gasket or not. From this you then will know the thickness this piece needs to be.

Another hatch detail. Remember that the wood forms are there to give shape to your finished structure.
Everything needs a bit of draft to it on at least one side. That is it cannot be square or it will be very hard to pull out. It must have some draft or slight angle on one side from 1/16-1/8". I put this one needed angle on the outside of the channel edge that will be going along the deck.

Don't worry about thight fits. Just get the corners cut to approximate lengths.
I like these gaps to fill in with clay as it makes them easier to remove later.

Once all the channel edges are in place I mark the corner angles that will need to be cut off. I do this with an angle grinder one at a time putting each one back in place after it looks right.

Here is the deck with the sheer edges in place, the cockpit edges built in and all the hatches in place ready for clay.

I like using basic kids clay. You can also buy wax fillets that are already radiused. These wax fillets you lay in place and use a stainless steel ball that it has on a tip of a rod to mold the wax fillets to the channel edges. The stainless ball is heated with a candle or by just having a kerosene lantern going to pass the ball into to heat up.
The wax system is more costly.
I have always used the clay method.
I feel the slightly better radiuses you get with the wax system is not worth the effort of the $ as you will be sanding the finished product and painting it with primer when done either way.

Cut the clay up into cubes, then roll out to make clay worms. This skiff was to have big a big sheer edge radius. Also nice moderate radiuses in the cockpit. Small radius = small skinny clay worms.

Lay in clay worm, smush in slightly and then push along with your finger tip using it as the radius.

Reeve wanted to have flush hinges so I made these plastic inserts for the hinges to lay into.

What you end up doing is pushing the clay into the gaps of the corners and making all your own little curves and radiuses using your finger tip points to smooth out the clay with. It's easy.

An army of worms. The round corners of the cockpit are made up of Kerfed plywood. To cover the saw cuts to make the ply bend you just cover with masking tape. Brown smooth packing tape is good too.

The deck all ready for wax now. I use any type of car wax or best yet is mold release paste wax.
Just wipe it on liberally. Best to do a coat. Then two more. By the time each one is done it will be dry enough to take another coat. If your wood is rough then slobber it up with wax.
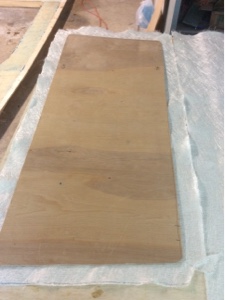
I make a drawing with all the sections divided up by numbers or letters. This way everything gets labeled and you can just reach over and get the right piece as you go along.
This part of the build process has to be done neatly and accurately because once you start you will be bending over rolling sticky resin and it all needs to fall into place with no hassles.
Remember it's 90 degrees in the shade here, Mosquitios about and during this build I was having to pass a kidney stone. I pissed it out like a water canon between breaks into the bushes.
As they say...everything came out all right in the end...er tip.

I am a stickler for cutting, labeling and folding my cloth pieces in the right direction as it will need to be rolled out.
Because Reeve was building this boat using RAKA epoxy I was stuck with having to use 1208 bi-axel cloth. So the matted side was to be laid down first. The the second layer was to be laid right side up so the matt would be facing the core that was to be laid into it all wet with epoxy resin.
Because it was averaging 90 degrees in heat everything had to flow along perfectly.
Shown here is the way I start rolling my cut cloth parts up. I fold a big edge over and the fold this in half in the middle to get a nice tight roll going. This is important with many other types of cloth rovings and such as they like to start coming apart. Keep the rolls neat.

See...

I lable with felt pens showing with a small arrow which way it's supposed to unroll.
It can get a bit confusing if not marked as all the rolls will look the same eventually. This helps.

Now the cloth is all cut I use the patterns again to cut out the deck core pieces.

Reeve built his hull with 3/4" Corecell core flat panels. We used up what he had left over. Because these sheets were smooth and flat I drilled vent holes in them to let out air when they were to be laid down into the wet cloth.
Cut the core with a jig saw. Keep all the dust away from the form because when you start glassing it's a pain when a small piece of stuff holds up your wet cloth.

An action shot of me wetting out and glassing in the hatch channels. I am used to sitting with my legs crossed like we all did in grade school. At 59 I can still do this kind of stuff all day long if needed.
Interesting thing is I still feel the same aches at the end of the day as I did when I was in my twenties.

Here the core is all bonded down and I'am filling in some gaps around the hinge plugs with putty.

When bonding the core down using flat sheets you will need to hold them down with a little bit of weight. This is because it's a full flat sheet. If using Kerfed core then it all just flows into place.

Now the deck is all cored, putty filled and the radiuses are ground off. Ready for the last layer of fiberglass cloth. This would be a single layer of 1208 Bi- axel laid down with the matt side on the core.
When I glass the initial deck layers I do not glass over the hatch channels. I make sure the cloth goes up the sheer edges and the cockpit edges. When the cloth gets to the hatch channels it just goes up about half way. This gives me an edge to glass to when I do the last layer. At this time I do all the hatch channels. They are tedious.


Deck is fully glassed and you can see the pattern and how it was used.

Now the fun part is to start removing the temporary moldings. Just unscrew and off they pop. Sometimes a flat screw driver is needed to coax the pieces off.
This is the same process that goes on in building cement buildings and structures. Just use your imagination when building the forms.

I was grinding the sheer edge off so I had some socks on.
I wear full clothing when cutting fiberglass.
A hammer under the bow for a bit of leverage and.......

Up she goes ! Reeve and Marc helping at this stage as they could not bend over so well to the floor as me. The deck weighed about 125lbs so was no big deal to move about.
Reeves skiff had a bit of reverse sheer to it. They were both worried that the deck would be too stiff and would not flow over the sheer. From experience I knew that these decks are a bit flexible over gental curves fore and aft.

Now I'am removing the hatch channels

Just use a hammer and screws like shown. Make sure you have something between the hammer and the deck to prevent crushing of the core.

Marc was convinced these raw wood channels would not come out. Ha !! With my system of sloppy corners the clay gap gives way and because it's epoxy resin which does not shrink so much they just slide right out.
Using polyester resin which in the heat we were experiencing would shrink faster it could be a bit tighter. But one corner always comes out. Then it's easy to get a pry lever under the next corner and the others will follow.
Marc was so impressed with my system he took me out to dinner to celebrate a new learned method.

The black lines are the cores company info. By not using a gelcoat which is not possible with epoxy resin everything is clear and you could see any air bubbles if they were there.

Now the skiff comes back into play. Because the deck pattern was accurate, and I remembered to flip the pattern over all fit like a glove.

You can see the crown here.

A great design by Marc at ENVI BOATS.

The deck fits the slight reverse sheer perfectly.

Now how to make each hatch fit perfectly in place with the right amount of crown.

What you do is go back to the deck mold and using a hatch pattern you cut like in the next drawing picture you just place on the deck where the hatch gutters were made and screw down the hatch edges. Pull out the pattern and clay in the radiuses.
Don't forget to add the recessed hatch hinge inserts. In the right matching place.

This explains how to get a perfect hatch pattern every time. You have to make these patterns because the hatches could be slightly off from side to side. You can't see this by eye till you try and set your hatch in place and it's an 1/8" off.
Remember you have to FLIP the made pattern from the finished deck you have outlined it from upside down to make the form to build it from.
Using this method you can make new hatches for any skiff or boat that needs a new hatch.

Clayed up, waxed and the core is ready.

Use the hatch pattern to cut your cloth with.


A little weight to hold the core in place.
One trick to getting your hatches to lay perfectly in place is to not glass the final layer on top of the core. Remove the hatches and set them into their respective hatch channels. If they fit perfectly they should all be about 1/16-1/8" lower than the deck surface depending how thick you plan on glassing the hatches. If you are building big deck hatches for a large boat then your depths and tolerances will be quite different then this lightweight project shown. Touch all their four corners to check to see how they will lay against the hatch channel lip. If there is any wobble you can mark this on the underside of the hatch to add glass to. If a corner is a bit high you can mark it and just sand that areas core away. This take seconds. Once happy then just finish glassing the hatch underside.
To find out how thick your glass skin needs to be just make 4 small clay balls and set the in the 4 corners on the hatch flange. Now gently lower the hatch onto these clay balls. Push the hatch down till it's perfectly level with the deck all round. Happy.. Now lift the hatch out and measure how thick each clay ball is after being compressed. Now you can see where to go from there.
Reeves hatches all fit perfectly so this was not needed.

After curing remove the edges. I cut the excess glass off before doing this. The hatches have perfect edges then. Now place in your new deck.


The thing you can do at this stage is to glass on added stuff like the side console, raised toe rails,
Cowlings for cables, stern sump areas and such.
Total hours labor time for this project was 56 hours over 6 days including my time buying the supplies for the deck plug.

It rained most evenings with big thunder storms. I enjoyed this as I was on land and my sailboat was hundreds of miles away from these boomers.
Some little guys that helped me, the yard was full of these little toads that I had to watch out to not step on.


I will post pictures of Reeves completed skiff as he sends them to me.
Thanks again Reeve for your wonderful friendship, hospitality and for letting me be part of your build.